A PCB can look flawless and still fail when power reaches its copper traces. A misplaced component, open connection, or solder bridge may cause intermittent faults that visual inspection cannot reveal. Electrical Testing Pcb checks whether a board’s circuits behave as designed, before those faults reach equipment or customers. The stakes are practical: a multimeter probe, flying-probe tester, or bed-of-nails fixture can expose problems while the board is still on the bench. Small details matter.
Industry guidance helps define what a reliable test should cover. IPC-9252B, Requirements for Electrical Testing of Unpopulated Printed Boards, provides a recognized framework for electrical testing of bare boards; IPC-6012E sets qualification and performance requirements for rigid printed boards. IPC’s 2024 Electronics Industry Economic Outlook offers broader context on the manufacturing pressures facing electronics producers, where quality and delivery expectations make early fault detection valuable. These sources do not replace a board-specific test plan. They help teams choose meaningful checks, such as continuity, isolation, and power-on measurements, while documenting limits and results. A test that only confirms continuity can miss a functional fault. That is easy to overlook. The sections that follow explain how to select a method, prepare the PCB, and interpret results without treating one pass as proof of perfection.
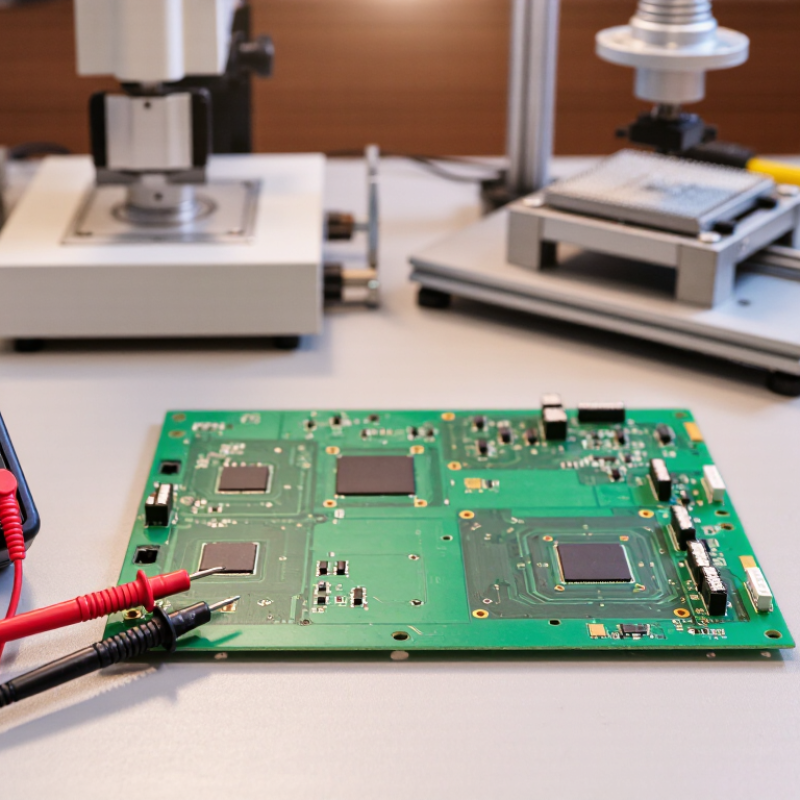
Before testing a PCB for electrical functionality, prepare it for safe inspection. Disconnect the power source, remove batteries, and allow stored charge to dissipate. Use an ESD-safe work surface. Under bright light, inspect both sides for solder bridges, lifted pads, cracked components, or debris. A magnifier helps. Photograph the board before making changes; later, even a small repair can obscure its original condition.
Use the schematic or netlist to locate ground, power rails, and key signal paths. Mark accessible test pads on a printed copy or in a clear photo. Do not rely on silkscreen labels alone; labels can be faint, misplaced, or shared across board revisions. Check that each chosen point matches the intended connection. With power disconnected, use a multimeter’s continuity mode to verify ground points and look for unexpected shorts between supply rails. Keep probe tips steady. A slipped probe can bridge adjacent pads.
Choose points with enough exposed metal for reliable contact, and note the expected voltage or signal before applying power. Some boards have no dedicated test pads, so a connector pin or component lead may be the practical alternative. That choice deserves care. Recheck the schematic and probe placement before powering the board, preferably with a current-limited supply. Preparation can feel fussy, but rushing it makes later readings harder to trust.
Before powering a PCB, inspect it under bright, angled light. Look closely. Check both sides for cracked solder joints, lifted pads, scorched areas, and components sitting at odd angles. A magnifier can reveal tiny solder bridges between neighboring pins. Note the component markings and polarity, especially around diodes and electrolytic capacitors. A board may look clean while hiding a fault beneath a connector or shield. That uncertainty matters. Avoid scraping residue away before recording its location; it may help explain a later test result.
Check your test equipment before trusting its readings. Inspect multimeter leads for split insulation, loose probes, or bent tips, then confirm the meter works on a known reference or a simple continuity check. With the PCB unpowered, measure resistance between supply and ground; a very low reading deserves investigation, but it does not prove a short by itself. For a bench supply, verify the output voltage and set a conservative current limit before connection. Watch for unexpected current, warmth, or unstable readings. Pause and repeat the measurement with secure probe contact. I have found that rushed probe placement can look like a board fault, so record the setup and check it again.
Before measuring continuity, disconnect the PCB from every power source and let its capacitors discharge. Keep the board unpowered. Set a multimeter to continuity or low resistance, then touch the probes together to confirm the meter responds. A beep only shows a low-resistance path; it does not prove that the intended connection is correct.
Check each critical net from one accessible point to another, such as a connector pin to a component pad. Hold the probes firmly on clean copper or exposed metal, and compare readings with the schematic or layout. A steady beep and low resistance often indicate continuity. No beep may reveal a cracked trace, cold solder joint, or missing connection. Probe both sides of a suspicious joint. Small pads can be slippery, so repeat the measurement before drawing a conclusion.
To look for shorts, measure between neighboring pins or between power and ground. A very low reading can signal a solder bridge, especially when nearby nets should be isolated. Still, capacitors and other components can create brief beeps or naturally low resistance. Watch how the reading changes, and compare it with an equivalent section if available. Be patient. It is easy to mistake a normal circuit path for a fault, and that uncertainty deserves a second check before rework.
Before applying power, inspect the board for solder bridges and confirm resistance between each supply rail and ground. Use a current-limited bench supply, then measure at the regulator output and at the load. Compare readings with the schematic and component datasheets; a rail that reads correctly at the regulator may still sag near a distant processor. Probe with a short ground lead to reduce misleading noise. Record it.
Check each component’s supply pin, not just the main rail. A 3.3 V rail feeding a sensor through a ferrite bead, for example, can show a lower voltage under load. Measure both sides of the bead, then check reset and enable pins. If readings drift, observe the rail with an oscilloscope for startup dips or ripple. Small errors can matter.
For boards exposed to supply disturbances, IEC 61000-4-11 defines test levels including dips to 40% of nominal voltage for 10 cycles at 50 Hz, or 12 cycles at 60 Hz. These are immunity-test conditions, not acceptable steady-state rail values. Use them to plan controlled testing, while judging normal operation against the circuit’s specified limits. A loose probe can spoil a measurement; I have seen that overlooked. Recheck the setup before changing components.
Example bench readings show each measured voltage within ±5% of its nominal value. Measure at the relevant test point with the board powered, and compare results with the circuit’s specifications.
A PCB can pass a visual inspection and still fail electrically. Start with an unpowered continuity test, checking critical nets for opens and shorts against the schematic or netlist. Then apply current-limited power and measure each rail at its test point. Watch for unexpected voltage drops, hot components, or a supply that enters protection. Small details matter.
Next, test signals under realistic conditions. Feed a known clock or input waveform into the board, then inspect the output with an oscilloscope. Check amplitude, frequency, timing, and noise against the design limits. Prismark’s 2024 PCB industry analysis estimates global PCB production reached roughly US$73 billion in 2023; at that scale, repeatable test records help teams catch faults before they spread across a production run. The figure is context, not a pass criterion. Each board still needs its own limits.
For functional checks, exercise connectors, sensors, and control paths with a repeatable test sequence. IPC-9252B describes electrical testing requirements for printed boards, while assembled-board checks should also follow the design’s documented acceptance criteria. Record the test setup, measured values, and failures—not just a pass mark. Retest intermittent faults after the board warms up or connectors are moved. This part can be messy. A stable reading once does not prove stable operation.